Sunday, December 26, 2010

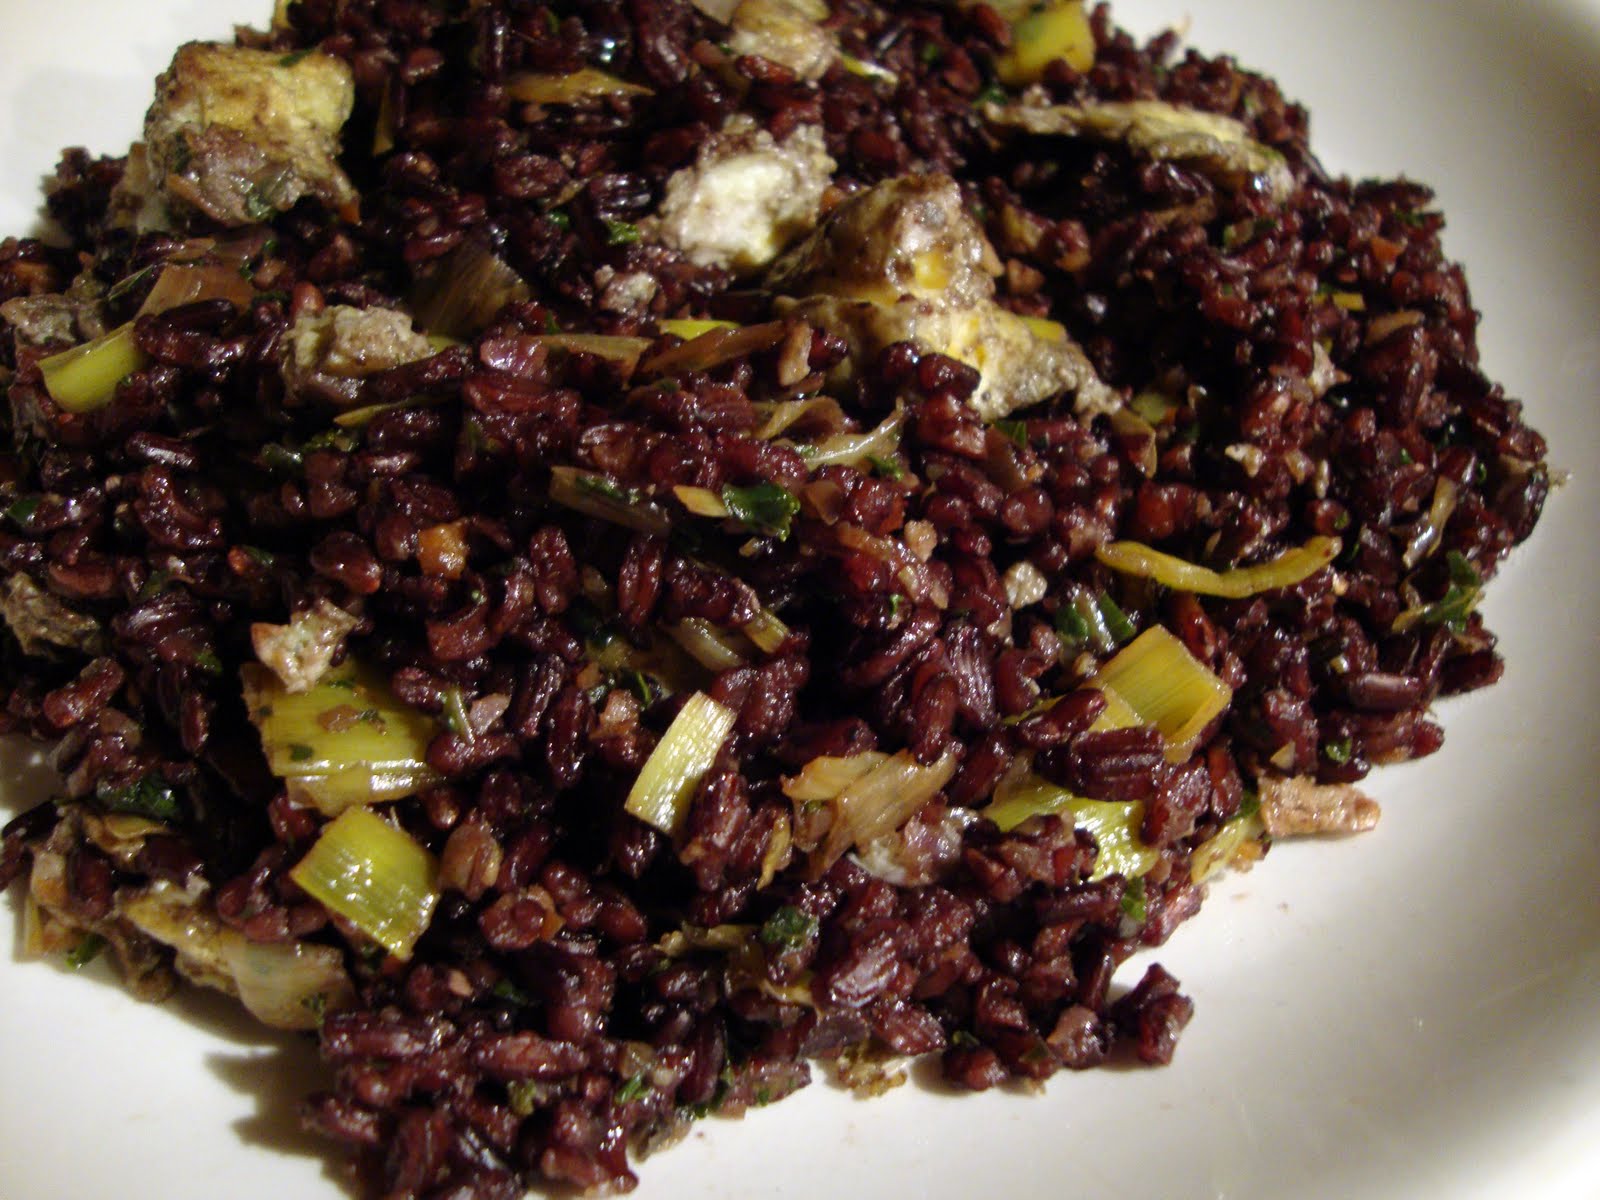
Hidden-Vegetable Fried Rice

The other day a friend whipped up a fabulous fried rice dish with red rice, onion, cabbage, and chili peppers. I wasn’t even planning to eat but when I saw that rice, I couldn’t resist.

Needless to say, I had fried rice on the brain and wanted to make some at home. A couple of days later, as I was shredding vegetables to ferment, it occurred to me that they would be perfect in a fried rice dish because they would sauté instantly and add a crunchy texture to the rice.

More importantly, if you’re trying to get your kids to eat more green or cruciferous vegetables, this is the perfect way to slip them into a dish, because they add a very nice uniform texture to the rice that is perfect for kids little teeth and a mild flavor that’s spread evenly over the rice so it won’t shock their tastebuds.

They’re also great for a quick soup. Today I got home from my yoga class and combined vegetable broth, a handful of mixed, shredded veggies, an egg and some dulse. It was flavorful, thick, had a little bit of a crunch to it, and literally took 5 minutes to make.

Eating healthy doesn’t have to be complicated or time consuming. This rice took a little more time than the soup, but if the rice and veggies are prepared ahead of time, it will go quick as well. I actually have a glass bowl filled with the vegetables in the fridge that are ready to use for the next few days. And any rice (except sticky rice) will work here. These days, I like the rich colors of the dark rices.


Hidden-Vegetable Fried Rice

3 – 4 c cooked rice (brown, black, mahogany, etc., cooked in vegetable broth)

2 T grapeseed oil, divided

1 c leeks, chopped crosswise

½ c each green and red cabbage, carrots, and kale, processed in the food processor into small particles

1 - 2 T tamari

3 eggs, scrambled or cooked omelet style then cut into bite-sized pieces

sea salt and pepper to taste

If not prepared ahead of time, cook the rice according to the directions on the package (I also soak my rice several hours before cooking). Meanwhile, heat 1T oil in a large skillet or dutch oven and sauté the leeks on medium heat until tender. Add the processed vegetables and sauté a couple of minutes more. Add the remaining oil, tamari, and the rice, mix well and continue to “fry” the rice for ~5 minutes. Add the egg, salt and pepper, and mix well. Serve immediately.

Monday, December 20, 2010

You'll Go Nuts for This Sauce


Recently, a girlfriend and I had dinner at the home of some mutual friends. One of them is a master at Thai massage and a phenomenal cook who has an exceptional diet. Everytime I go there I'm treated to something wonderful (like his fried red rice yesterday : )

At dinner, he served us a beautiful platter with egg, fried tofu and sweet potato. Accompanying this was a nut-based satay sauce that is typically served with a very similar Indonesian dish called gado-gado, that paired really well with a beautiful display of veggies that included carrots, cabbage, snow peas, banana flowers, garlic flowers, bamboo shoots, long beans, watercress, and sprouts. It was a divine meal, enjoyed with some wonderful friends in a warm, cozy atmosphere. A perfect combination, I would say.

If you don’t have nut allergies, this sauce would round out a nice vegetarian meal with vegetables and grains and even fruit. And, if you’re having a tough time getting your kids to eat their green beans and broccoli, this is a healthy alternative to dousing them with melted cheese.


Mixed-nuts Sauce


1- 2 T grapeseed or coconut oil
2 cups mixed nuts
8 cloves garlic, chopped
4 shallots, chopped
3 fresh/frozen chilli peppers (1/2 tsp chilli powder)
1/2 tsp brown sugar
1 tbsp dark soy sauce
450 ml / 16 fl oz / 2 cups water
1 tbsp tamarind water or juice of a lemon
1 cup coconut milk

A thin slice of shrimp paste (optional)

Salt to taste

Stir-fry the mixed nuts for 4 minutes. Remove with a slotted spoon to drain in a colander, and leave to cool. Then pound or grind the nuts into a fine powder, using a blender, coffee grinder, or pestle and mortar.

Crush the garlic, shallots and shrimp paste in a mortar with a little salt, and saute in the remaining oil for 1 minute.

Add the chilli powder, sugar, soy sauce, water, and coconut milk. Bring this to the boil, then add the ground peanuts. Simmer, stirring occasionally, until the sauce becomes thick; this should take about 8-10 minutes.

Add the tamarind water or lemon juice and more salt if needed.

When cool, keep in a jar in the fridge. Reheat as required for use with satay or as a dip for lalab crudites or savory snacks. The sauce will keep in the fridge for up to 1 week.

Sunday, December 12, 2010

A Home-spun Version of Bibimbap

The Korean word bibimbap translated literally means mixing (bibim) rice (bap). It is my favorite Korean dish and one that I regard as comfort food. Think, cold, rainy or snowy evening enjoying this meal. To me, it’s a healthy and delicious way to get a variety of vegetables in the winter.

If you’ve never had bibimbap at a Korean restaurant, you don’t know what you’re missing. It is served to you at the table in a sizzling stone pot layered with rice and small piles of vegetables, sprouts, sea vegetables, mushrooms, meat or tofu topped with an egg. It also comes with a side of a sweet and spicy red sauce called Kochujang.

To eat this dish, you begin by literally scrambling the contents with a large spoon, exposing the delicious crunchy crust of rice from the very bottom of the pot. Kochujang sauce is then added into the mixture. It’s hard to believe that something that seems so simple to me can taste so wonderful.

The other night, armed with a fridge full of veggies, I decided to make my home-spun version of this dish – without the stone pot and the crunchy crust. I began with a base of buckwheat and rice (a blend of black and mahogany) and then topped it with veggies, seaweed, tofu, mushrooms, egg, and a sprinkle of sesame seeds. I finished it off with the Kochujang sauce (recipe below). The result is the pretty dish you see above.

This would work well with leftover vegetables, rice, and even meat if desired. Just reheat, assemble, and add the sauce.


The Dish

Cooked rice or any combination of rice and whole grains;

Any combination of vegetables, cut into strips and quickly sautéed:

- carrots, zucchini, peppers, scallions, mushrooms (or dried mushrooms that have been soaked);

- seaweed that has been soaked and drained – I used arame;

- ground or chopped meat or tofu – I drained some firm tofu, cut it into rectangles, fried it in a little grapeseed oil, then seasoned it with a little pepper, tamari, and sesame oil;

- a sunny side up egg;

To make the dish pretty (for a few minutes anyway : ), spoon hot rice or grain mixture into the bottom of a wide bowl. Arrange the vegetables, meat, and/or tofu in piles around the outer edge of the rice. Place the egg on top in the middle. Sprinkle with sesame seeds, add a large spoonful of Kochujang sauce, then get to work mixing it all together and enjoy!

Kochujang Sauce

2 T chili paste

2 cloves garlic, minced

1 T soy sauce or tamari

1 t sesame oil

2 scallions, chopped small

2 t sugar (I used maple syrup)


Mix all the ingredients together well. This makes about 1 – 2 servings.

Wednesday, December 8, 2010

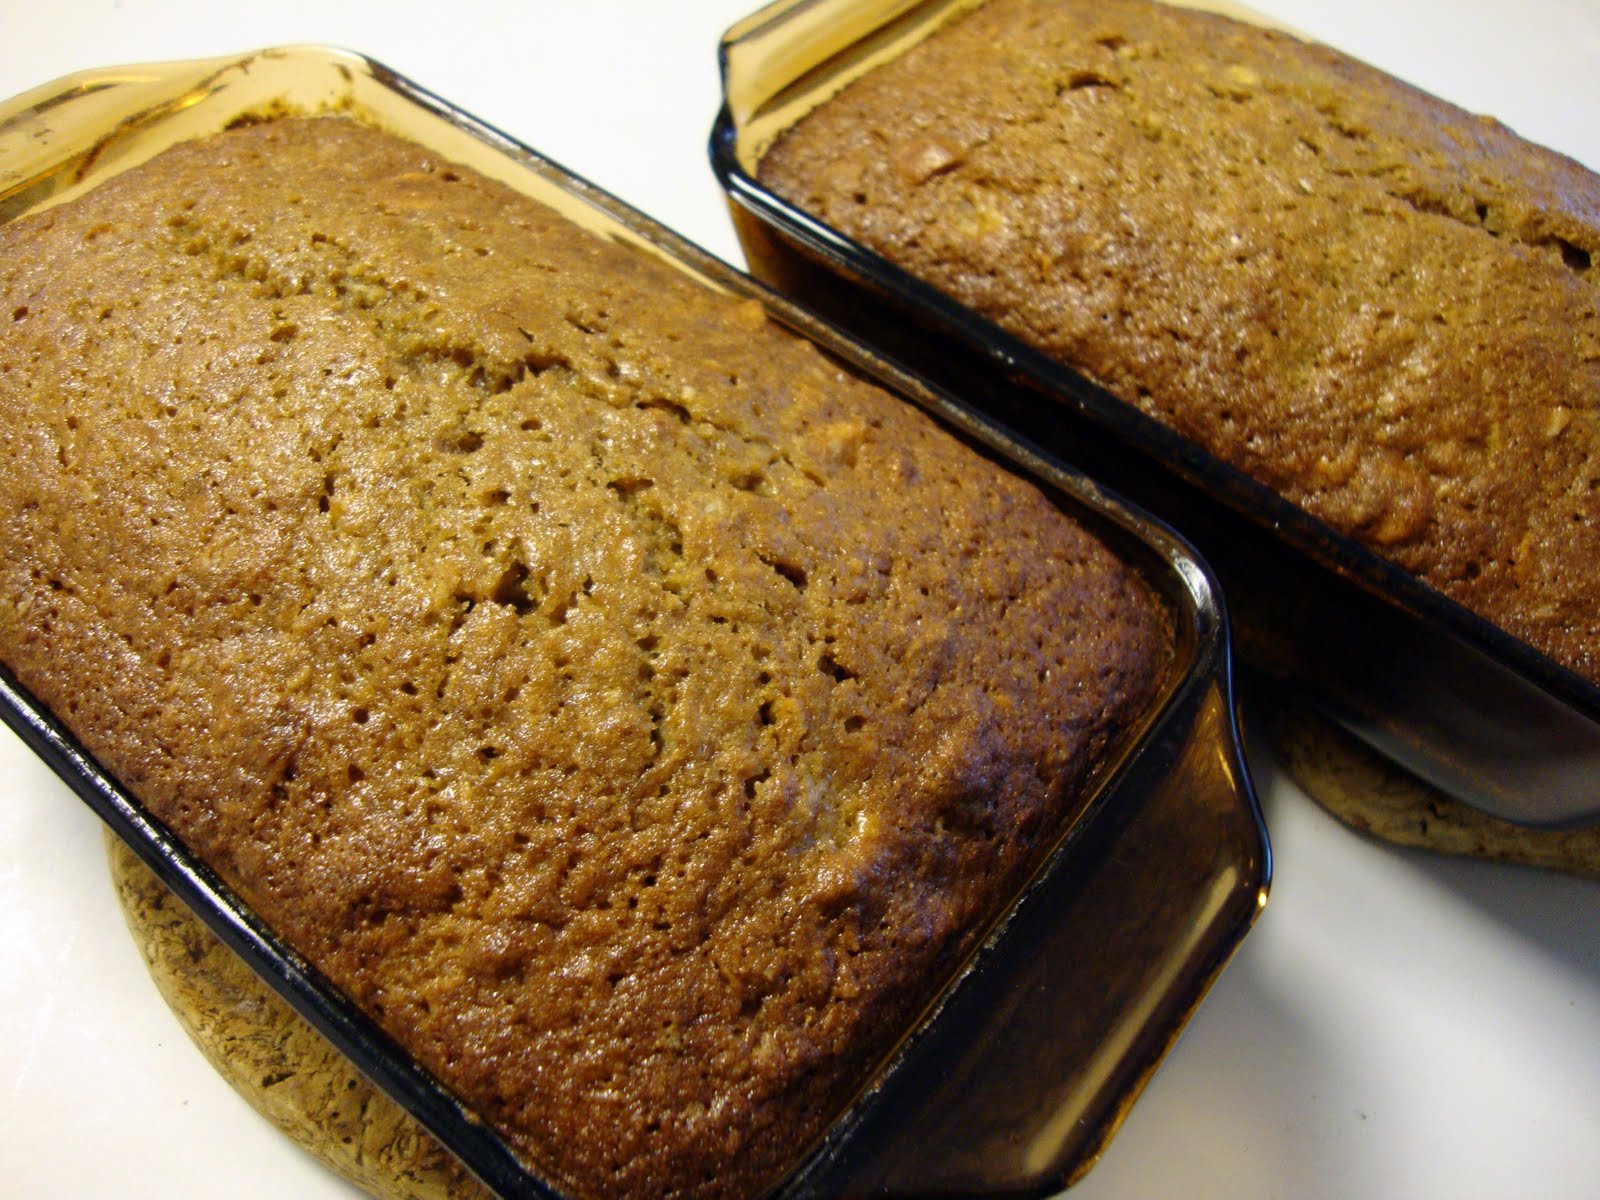
Hawaiian Banana Bread

Who doesn’t love banana bread? Or I should say, who doesn’t love good banana bread? I say that because banana bread is one of those foods that require the starring ingredient be as brown and nasty as possible (on the outside, that is, while still being edible on the inside!). The riper the bananas, the better tasting the bread.

So I had bananas sitting for days, and I waited patiently for them to ripen. Finally, I started searching the grocery stores (I even called a couple) and I found the same green bunches of fruit on the shelves.

Finally I looked at my bananas and decided that the recipe I was about to try would be forgiving enough to work with bananas that were now at their peak: perfect sliced on a bowl of granola or atop a pile of pancakes–just the right softness without a speck of brown.

After checking out several recipes for Hawaiian Banana Bread, I went with the recipe below. The original recipe is here. I made a number of substitutions, including replacing half of the oil with *coconut milk (had some left over from the Tomato Soup recipe), using a different sugar and whole grain spelt flour.

The result was fabulous. It got thumbs up from five taste testers. It’s moist, flavorful–yes, the flavor of banana shines through and I can only imagine what it would taste like using super-ripe bananas. I’ll let you know : )


Hawaiian Banana Bread

½ c grapeseed oil

½ c coconut milk

2 c sugar (I used sucanat)

3 eggs, beaten

2 t vanilla

4 very, very ripe bananas, mashed

8 oz crushed pineapple, drained

3 c flour (I used whole grain spelt)

1 t salt

1 t baking soda

1 t cinnamon

½ c shredded unsweetened coconut

1 c chopped macadamia nuts

Preheat the oven to 350°F. Pour the oil, coconut milk and sugar in a large bowl and mix well. Add the eggs and vanilla, then mix in bananas and pineapple. Combine the dry ingredients and mix slowly into the wet ingredients until combined.

Divide the batter between two 9 x 5 greased loaf pans and bake for ~1 hour, or until a toothpick inserted in the center comes out clean. Cool in the pan for 10 minutes, then remove and cool on a wire rack.


*Why do I use coconut milk so often? Besides the fact that it’s versatile and it tastes great, it provides some health benefits that you may not be aware of. The saturated fat in coconut milk is made up of medium and short chain fatty acids which tend to get burned for energy rather than stored. One of the main components is lauric acid, which is anti-viral, anti-fungal, and anti-bacterial. The milk also contains some important nutrients such as potassium and calcium and it’s dairy free.

Sunday, December 5, 2010

A Creamy Tomato Kale Soup

It’s soup weather and I’m already thinking about what I’d like to create in a pot this Winter! Growing up, tomato soup was one of my favorites and it came from a can–we just added milk or water. It wasn’t until several years ago that I began making my own tomato soup and realized what I had been missing all those years!

Today, a friend and I came up with this recipe below. We used tomatoes that we roasted in the oven (absolutely worth the effort and described here), sundried tomatoes, fresh herbs, and coconut milk in place of dairy, but you could easily substitute milk/cream instead. To bulk up on the nutrients, we also added a healthy dose of kale.

Also, if it’s too acidic for you, you can add a teaspoon of sweetener. We used sucanat and it tasted great, but we also liked it before the sugar was added.

We loved this soup and it even got the seal of approval from my girlfriend’s 13-year-old son and his friend. To me, that says it all, because any way you can get your kids to eat unprocessed foods with green vegetables is a good thing!


Tomato Kale Soup

3 lbs tomatoes, roasted, or ~4 c chopped, roasted tomatoes (from a carton or can)

2 c vegetable broth

1 c sundried tomatoes (not in oil)

1 T grapeseed oil

1 medium onion, chopped

1 c chopped carrots

1 T fresh oregano, chopped

1 T fresh basil, chopped

1 t sweetener, such as cane sugar or sucanat (optional)

3 cloves garlic

2 c kale, leaves removed from stem and chopped

1 c coconut milk

salt and pepper to taste

If using roasted tomatoes, remove the skins and set the tomatoes and juices aside. Heat the vegetable broth to a boil then remove from heat. Add the sundried tomatoes and let them soak for a few minutes.

Meanwhile, heat the oil to medium in a large pot and add the onion. Saute for 5 minutes, then add the carrot. Mix well and continue to let cook over medium heat for an additional 5 minutes.

Add the tomatoes, oregano, and basil. Remove the sundried tomatoes from the broth and coarsely chop, then add them and the broth to the pot. Cover and let simmer until the carrots are cooked, ~10 minutes.

Add the garlic and kale and simmer until the kale turns a bright green color. Use an immersion blender to blend the soup in the pot or blend it in small batches in a blender.

Return the soup to the pot and add the coconut milk. Mix well and adjust the taste with salt and pepper and additional coconut milk if desired.

Enjoy with a crusty artisan bread or if you really want to go for the comfort meal, a grilled cheese sandwich (on whole grain bread of course : )) Enjoy!!

Monday, November 29, 2010

Get Cultured with Fermented Vegetables

I’ve written before about the benefits of adding probiotics to the diet in the form of cultured dairy products and fermented foods like miso and tempeh. This time of year, especially, it’s important to keep the immune system in top condition to ward off colds, the flu and the myriad of infections that can arise during the cool, dry winter months. Probiotics are an effective way to do just that.

One method I’ve been using to add more probiotics into my diet is culturing vegetables. This time of year, in particular, I believe they’re a great idea because we often skimp on the veggies we consume during the cold months and opt for heavier, cooked foods. This is fine and even preferable for me too because my body naturally wants warmer, heartier meals right now. It’s helpful, though, to balance the diet out a bit with some raw food and the root veggies and heartier winter crops are the perfect varieties for fermenting.

There is also a significant benefit to fermenting vegetables of the Brassica family, including kale, cabbage, brussel sprouts, cauliflower, broccoli, etc. In their raw state, these vegetables have thyroid-suppressing activities because they can interfere with the uptake of iodine by the thyroid. However, fermented vegetables lose this property while still remaining raw. They are also alkaline in nature and therefore detoxifying and a great alternative for people who stay away from dairy products.

It’s easy and inexpensive to make your own cultured vegetables. Here’s what you need (adapted from BodyEcology.com):

- A sealable glass container, one to two quart

- A large bowl

- a cutting board and sharp knife

- blender and/or food processor

- mixture of veggies: cabbages, carrots, cauliflower, sea vegetables,

- fresh herbs, garlic, ginger, seeds like fennel or caraway, pepper, etc.

1. Wash well and chop finely or shred/process a mixture of vegetables of your choice.

2. Mix together in a large bowl. In the blender, add a couple of cups of the mixture and enough water to blend into a thick liquid.

3. Add the liquid slurry to the bowl of veggies and mix well.

4. Pack the vegetables into your glass container, leaving an inch or two at the top.

5. Stuff a couple of rolled-up cabbage leaves at the top of the container and seal the container.

6. Leave undisturbed in a warm place (~70°F) for ~3 - 7 days (Although, I do invert the jar once per day to redistribute the liquid that naturally settles to the bottom. Is this interfering with the fermentation process? I don't know for sure, but my veggies are usually ready within 7 days). Check the taste. They should taste vinegar-y. When they reach the desired flavor, refrigerate to slow the fermentation process.

7. Eat as a side with your meals, in salads, sandwiches or wraps, or as a topping to other foods. They should be eaten raw, though, the preserve the beneficial enzymes and bacteria. Enjoy!

Friday, November 19, 2010

More Brussel Sprouts Please!

Growing up, I was not a big fan of brussel sprouts. I vaguely remember them being served at dinner, taking one bite and deciding they were not my favorite food. Although, I think it would be rare to find a child that liked them. These days, I love seeing them in the store and immediately reach for a few handfuls because I know that their health benefits are tremendous and that I am equipped with a few recipes that allow me to welcome them on the dinner table. In fact, the last time I made them, they were my dinner!

The recipe below features warm, Autumn colors and a combination of nutty, tangy flavors that go well with the bitterness of the brussel sprouts. If you’ve got the time, you can also roast your own cranberries. They really do add a special touch to this recipe and will also eliminate the excessive sugar that can be found in dried cranberries. This pretty dish would make a beautiful addition to your Thanksgiving table.

Brussel Sprouts with Cranberries and Pecans

½ c pecans

1 T grapeseed oil

1 lb brussel sprouts, washed, stems and outer pieces removed

1 T grated ginger

orange zest and juice from one large orange

½ c dried or roasted cranberries (see below)

1 T butter

Heat a skillet, then add the pecans and lightly toast. Remove them from the pan and chop coarsely. Heat oil in a large skillet. Chop the brussel sprouts in half lengthwise. Add them to the skillet and sauté until lightly browned. Add the grated ginger, orange juice and zest, and cranberries. Cover and let simmer for 5 – 10 minutes until sprouts are the desired tenderness. You can also add a bit of water if it needs more liquid. Add the pecans and butter and mix well. Serve warm.

Roasted Cranberries

1 12 oz. bag cranberries, picked through, washed and dried

1 T grapeseed oil

2 – 3 T maple syrup

Heat the oven to 225°F. Using a wire whisk, mix the grapeseed oil and maple syrup in a medium bowl. Add the cranberries and toss well to coat. Transfer into a single layer to a glass or ceramic flat-bottomed baking dish. Bake for ~45 minutes. Stir, then bake for an additional 30 minutes or until they start to shrivel. Let cool then refrigerate in a sealed container.